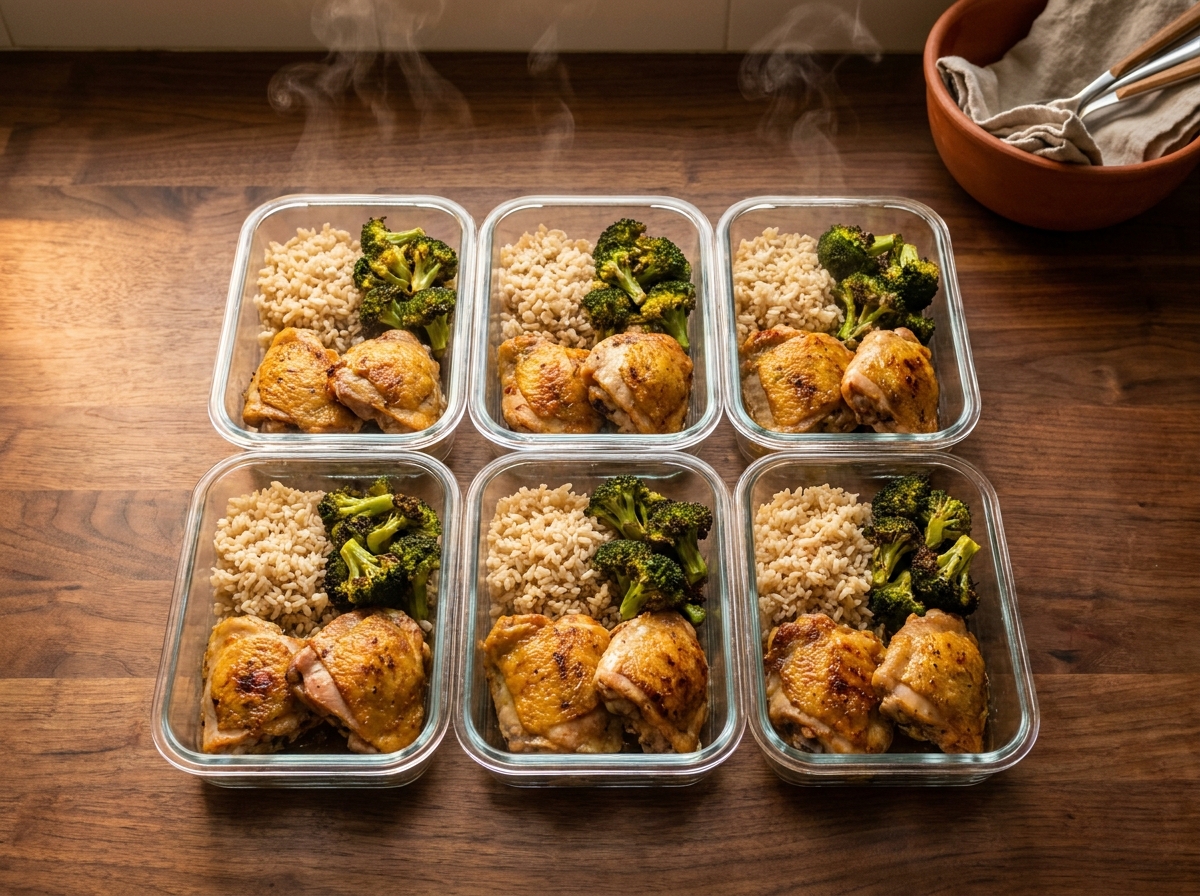
I've prepped with both cuts back to back for months to settle the debate properly. The result is not even close. Chicken thighs outperform breast for meal prep on every metric that matters after Monday: cost, flavour on day 4, reheating quality, and forgiveness during cooking. If you've been using breast and wondering why your Thursday lunch tastes like cardboard, the cut is the problem — not your technique.
This guide covers seven proven thigh recipes across every cooking method, the exact temperature targets that make thighs extraordinary, the brining technique that fixes the one scenario where breast might be preferable, and the reheating method that makes day-4 chicken taste intentional rather than like an obligation.
Why Chicken Thighs Beat Breasts for Meal Prep — The Actual Numbers
The comparison is worth making specific because "thighs are better" doesn't explain why they hold up across 4 days of refrigeration and repeated reheating where breast fails.
| Factor | Chicken Thigh (bone-in) | Chicken Breast | Winner |
|---|---|---|---|
| Price per lb (2026 Walmart) | $1.99–$2.49 | $2.99–$3.99 | 🏆 Thigh by $1–$1.50/lb |
| Fat content (per 4oz) | 9–10g | 3–4g | Thigh (fat = moisture + flavour) |
| Protein per 4oz cooked | 26–28g | 34–36g | Breast (but thigh wins on cost/g) |
| Day-4 texture reheated | Still moist and flavourful | Dry, rubbery at centre | 🏆 Thigh decisively |
| Overcooking tolerance | 10–15°F past target = more tender | 5°F past target = noticeably drier | 🏆 Thigh for meal prep |
| USDA minimum safe temp | 165°F (74°C) | 165°F (74°C) | Same — Salmonella and Campylobacter destroyed at this temp |
| Optimal meal prep temp | 175–180°F (79–82°C) | 160°F (71°C) + 5 min rest | Different targets, different reasons |
| Cost per 10g protein | $0.10–$0.12 | $0.10–$0.13 | Similar — thigh wins on volume |
The fat and collagen in thigh meat are the structural reasons it stays moist after refrigeration and reheating. When collagen converts to gelatin during cooking at 175–180°F (79–82°C), it creates a natural moisture reservoir that redistributes through the meat during reheating. Breast meat has almost none of this — every reheating cycle pulls more moisture out of the fibres with no reservoir to compensate.
Bone-in for oven and sheet pan cooking: the bone insulates the meat and the skin side up roasting position creates the crispiest exterior. They cost 30–50% less than boneless. Debone after cooking while still warm — it takes 2 minutes and is much easier than deboning cold. Boneless for stovetop, air fryer, and slow cooker: faster to cook, easier to portion by weight, better for shredding applications. Both are correct depending on the recipe.
The Temperature Guide That Changes Everything
The USDA minimum safe internal temperature for all poultry is 165°F (74°C) — this destroys Salmonella and Campylobacter, the primary bacterial risks in raw chicken. This is the floor. For thighs used in meal prep, the optimal target is significantly higher.
Here is what happens at each temperature range, and why it matters specifically for meal prep:
- 165°F (74°C): Safe minimum. Meat is cooked through but can feel slightly firm. For breast, this is the correct pull temp. For thighs used in meal prep, this is the entry point — not the target.
- 175–180°F (79–82°C): The meal prep sweet spot for thighs. At this range, the collagen in the connective tissue converts to gelatin. The meat becomes genuinely pull-apart tender, stays moist through day 4, and reheats without drying. This is 10–15°F above the USDA minimum — legal, safe, and specifically beneficial for thigh texture.
- 185°F+ (85°C+): Past this point, even thighs begin to lose moisture faster than they gain texture benefit. Reserve for braised and slow-cooked preparations kept in liquid throughout.
Oven models vary significantly in actual temperature versus dial temperature. Thigh thickness varies between 2oz and 6oz in the same package. Cooking by time alone is unreliable. An instant-read thermometer ($15–$20) tells you when the thigh is actually at 175°F — not when the timer says it should be. For meal prep food safety, this is the single most useful kitchen tool you own. Salmonella is the risk in undercooked poultry; verifying temperature eliminates it completely.
The 7 Chicken Thigh Meal Prep Recipes
Recipe 1 — Classic Sheet Pan (Oven · 35–38 min · 5 servings)
The most versatile recipe in this guide. Pairs with any grain and any sauce — rotating the sauce is how you eat the same base protein Monday through Friday without boredom.
Ingredients: 2 lbs bone-in chicken thighs, 1.5 tbsp olive oil, 1 tsp smoked paprika, 1 tsp garlic powder, ½ tsp onion powder, ½ tsp dried thyme, 1 tsp salt, ¼ tsp black pepper.
Method: Preheat oven to 425°F (220°C). Pat thighs completely dry with paper towels — surface moisture is what prevents crispy skin. Rub each thigh with olive oil, then coat evenly with the spice mix. Place skin-side up on a rimmed sheet pan, not touching each other. Into oven 35–38 minutes until internal temperature reads 175°F (79°C) at the thickest part, away from the bone. Rest 5 minutes on the pan before plating — the juices redistribute.
Storage: Cool 20 minutes on an open surface before sealing. Refrigerate in airtight containers with 1 tbsp pan drippings. Per USDA FoodKeeper: 4 days at 40°F (4°C), 4 months frozen.
Recipe 2 — Teriyaki Glaze (Oven · 38 min · 5 servings)
The sauce doubles as a cooking glaze and a serving sauce — make it once, use it both ways.
Glaze: 3 tbsp soy sauce + 2 tbsp honey + 1 tsp sesame oil + 1 tsp fresh ginger grated + 2 garlic cloves minced + 1 tsp cornstarch whisked in. This makes enough to coat the chicken and reserve for serving — divide it in half before using.
Method: Coat thighs in half the glaze. Place skin-side up on a parchment-lined sheet pan. Roast at 425°F (220°C) for 30 minutes. Brush with reserved glaze, return to oven for 5–8 more minutes until glaze caramelises and internal temp reads 175°F (79°C). Serve over brown rice with sesame seeds and sliced spring onion.
Why this works across 4 days: The teriyaki glaze acts as a secondary flavour coating that rehydrates during reheating. Day-4 teriyaki thigh reheated in a covered pan with 1 tbsp water tastes better than day-1 plain breast. This is the recipe to make if you're new to thigh meal prep — the glaze removes all ambiguity about whether the result is good.
Recipe 3 — Slow Cooker Pulled (Low 6h or High 3h · 6 servings)
The lowest-effort recipe on this list. Active time: 4 minutes of ingredient dumping. The slow cooker does everything else.
Ingredients: 2.5 lbs boneless chicken thighs, 1 can (14.5oz) diced tomatoes, 1 cup chicken broth, 3 garlic cloves minced, 1 tsp cumin, 1 tsp smoked paprika, 1 tsp chili powder, 1 tsp salt, juice of 1 lime.
Method: Place all ingredients in the slow cooker. No browning needed. Liquid from the tomatoes and broth keeps everything moist without any additional fat. Low for 6 hours or high for 3 hours. The thighs will shred with two forks directly in the pot — the cooking liquid becomes the sauce. Taste for salt and lime before portioning.
5-day versatility: This is the most versatile prep in the guide. The same pulled chicken works in bowls over rice (Monday), in quesadillas (Tuesday), in wraps with avocado (Wednesday), over pasta (Thursday), in scrambled eggs for a protein breakfast (Friday). One 4-minute prep session, five different meals.
Recipe 4 — Air Fryer Crispy (400°F/200°C · 22–25 min · 4 servings)
The crispiest skin of any method in this guide — and critically, the skin texture holds better after refrigeration than oven-roasted thighs. The rapid air circulation creates a drier, crispier exterior that doesn't go as soggy after 24 hours in a container.
Ingredients: 4 boneless skin-on thighs, 1 tbsp olive oil, 1 tsp garlic powder, 1 tsp smoked paprika, ½ tsp onion powder, ¼ tsp cayenne, 1 tsp salt.
Method: Pat thighs dry. Coat with oil and spices. Air fry at 400°F (200°C) for 22–25 minutes, flipping once at the 12-minute mark. Target 175°F (79°C) internal. Let rest in the air fryer basket with heat off for 3 minutes — the skin crisps further as it cools slightly.
Reheating air-fryer thighs: Return to the air fryer at 375°F (190°C) for 4 minutes rather than microwaving. This restores approximately 80% of the original crispiness. Microwaving air-fryer thighs produces acceptable results but loses the skin texture that makes this recipe worth choosing.
Recipe 5 — Lemon Mediterranean (Oven · 35 min · 5 servings)
The most repeat-palatable recipe in the rotation — the lemon acidity prevents the flavour fatigue that sets in by day 3 with richer preparations.
Marinade: 3 tbsp olive oil + juice and zest of 1 large lemon + 3 garlic cloves minced + 1.5 tsp dried oregano + 1 tsp dried thyme + ½ tsp dried rosemary + 1 tsp salt + ½ tsp black pepper. Marinate thighs minimum 20 minutes, or up to 24 hours refrigerated.
Method: Remove from marinade. Pat lightly — leave some herb cling but remove excess liquid. Roast skin-side up at 425°F (220°C) for 35 minutes to 175°F (79°C). Serve with quinoa or brown rice, hummus, roasted bell peppers, cucumber, and olives.
Why the lemon matters across multiple days: Acidic marinades act as a secondary tenderiser. The lemon zest in particular provides lasting flavour that intensifies slightly over 2–3 days in the fridge, making this one of the few prep proteins that genuinely tastes better on day 3 than on day 1.
Recipe 6 — Korean Gochujang (Oven · 35 min · 5 servings)
Gochujang — Korean fermented chili paste — is one of the best flavour bases for meal prep because it contains natural umami compounds (from fermentation) that deepen over 2–3 days of refrigeration. The flavour payoff gets better mid-week.
Marinade: 2 tbsp gochujang + 1 tbsp soy sauce + 1 tbsp honey + 1 tsp sesame oil + 1 tsp rice wine vinegar + 2 garlic cloves minced + 1 tsp fresh ginger grated. Marinate 30 minutes minimum — gochujang penetrates deeply with time.
Method: Roast at 425°F (220°C) for 35 minutes to 175°F (79°C). The gochujang caramelises on the skin to a deep mahogany crust. Serve over short-grain white rice with sesame seeds, sliced spring onions, and a side of kimchi if available.
Heat level note: Standard gochujang is medium heat — warm but not overwhelming. For less heat, use 1 tbsp gochujang and 1 tbsp miso paste as a combination. The miso adds depth without the chili intensity.
Recipe 7 — One-Pan with White Beans and Spinach (Stovetop + oven · 25 min · 4 servings)
The most nutritionally complete single recipe in this guide: 38g protein per serving, 8g fibre from the beans, iron from the spinach and beans, and a complete meal in one pan requiring one washing up. This is the recipe for the day you don't want to think about what else to add to the container.
Ingredients: 4 boneless thighs, 1 tbsp olive oil, ½ diced onion, 3 garlic cloves minced, 1 can (14.5oz) diced tomatoes, ½ cup chicken broth, 1 can (15oz) white beans (drained and rinsed), 1 tsp Italian seasoning, ½ tsp smoked paprika, 1 tsp salt, 2 cups fresh spinach, juice of ½ lemon.
Method: Heat olive oil in a large oven-safe skillet over medium-high. Season thighs with salt and paprika. Sear skin-side down 4 minutes without moving — resist the urge to check, the skin will release cleanly when it's ready. Flip, sear 3 minutes. Remove thighs to a plate. In the same pan: sauté onion 3 minutes. Add garlic, cook 1 minute. Add tomatoes, broth, white beans, Italian seasoning. Stir to combine. Return thighs to the pan, nestle into the sauce. Cover and simmer over medium-low heat for 12 minutes until thighs reach 175°F (79°C). Remove from heat. Stir spinach into the sauce around the chicken — it wilts in 2 minutes from residual heat. Squeeze lemon over everything.
Storage: Store thighs with the bean and spinach sauce in the same container — the sauce keeps the chicken moist over 4 days and the beans absorb the flavour further by day 3. Per USDA FoodKeeper: cooked poultry and bean dishes 4 days at 40°F (4°C).
The Complete Chicken Thigh Reheating Guide
Reheating method determines whether day-4 chicken is acceptable or genuinely good. The wrong method — microwave at full power from cold — produces the dry, tough result that gives meal prepped chicken its bad reputation. Here are the four reheating approaches ranked by result quality:
Method 1 — Covered Stovetop with Broth (Best result)
Add thighs to a cold pan with 2–3 tbsp chicken broth or water. Cover. Medium-low heat. 3–4 minutes until warmed through to 165°F (74°C). The steam from the broth rehydrates the surface of the meat and prevents the tight, chewy texture that full-power microwaving causes. This method produces the closest result to freshly cooked chicken on days 3–4.
Method 2 — Air Fryer Reheat (Best for crispy skin)
375°F (190°C) for 4 minutes. No added liquid needed. The circulating air restores the crispy skin better than any other method. Best for air-fryer thighs (Recipe 4) or any thigh where skin texture matters.
Method 3 — Microwave at 70% Power (Fastest acceptable result)
Place thighs in a container with 1 tbsp water or broth in the bottom. Cover with a damp paper towel or the container lid slightly vented. Microwave at 70% power for 75–90 seconds. Check temperature — should reach 165°F (74°C). The lower power and the damp towel together prevent the rapid surface moisture loss that full power causes.
Method 4 — Oven reheat (Slowest — use only if reheating a large batch)
Cover with foil, 325°F (163°C), 12–15 minutes. Best for reheating 6+ thighs at once for a family meal. Overkill for individual portions.
| Method | Time | Result | Best For |
|---|---|---|---|
| Covered stovetop + broth | 3–4 min | Most moist — closest to fresh | All thigh recipes, daily use |
| Air fryer 375°F (190°C) | 4 min | Restores crispy skin | Air fryer thighs (Recipe 4) |
| Microwave 70% power | 75–90 sec | Acceptable — slightly drier | Office lunches, quickest option |
| Oven 325°F (163°C) covered | 12–15 min | Even heat — good for large batches | Family reheating 6+ pieces |
When portioning into containers after cooking, add 1–2 tablespoons of the pan drippings or cooking juices to each container before sealing. This thin layer of fat and flavour concentrated liquid keeps the chicken hydrated over 4 days in the refrigerator and adds a depth of flavour to reheated thighs that plain stored chicken doesn't have. It's a 10-second step that has a meaningful impact on day-3 and day-4 quality.
Sauce Rotation — How to Eat the Same Protein 5 Days Without Boredom
The single most effective meal prep variety strategy: store the chicken plain (or with only its cooking marinade), and vary the sauce at serving time. Five sauces, prepared in 3 minutes each, transform the same classic sheet pan thigh into five genuinely different meals:
| Day | Sauce | Ingredients (2 min) | Pairs With |
|---|---|---|---|
| Monday | Honey-Soy | 3 tbsp soy + 2 tbsp honey + 1 tsp sesame oil + ½ tsp ginger | Brown rice + broccoli |
| Tuesday | Chipotle Yogurt | ½ cup Greek yogurt + 1 chipotle pepper in adobo + lime juice + salt | Rice + roasted sweet potato |
| Wednesday | Lemon-Herb | 2 tbsp olive oil + lemon juice + 1 tsp oregano + garlic + salt | Quinoa + cucumber + hummus |
| Thursday | Peanut-Ginger | 2 tbsp peanut butter + 1 tbsp soy + 1 tbsp rice vinegar + ginger + water | Rice noodles or rice + edamame |
| Friday | Harissa-Tomato | 1 tbsp harissa paste + 1 tbsp olive oil + lemon + cumin | Couscous or pita + roasted veg |
All five sauces can be made on Sunday in 10 minutes total and stored in small jars for the week. Add at serving time — not when portioning — so they don't alter the chicken's moisture during storage and each eating occasion feels fresh-made.
For the complete chicken meal prep system covering all cuts, all cooking methods, and the brining technique that finally makes breast viable for meal prep, see the chicken meal prep guide. For the full 5-day plan that uses thighs as the primary protein across 140g daily protein targets, see the high protein meal prep guide. For the sheet pan timing system that cooks thighs alongside vegetables in one session, see the sheet pan meal prep guide.
FAQ
Why are chicken thighs better than breasts for meal prep?
Chicken thighs have 9–10g fat per 4oz versus 3–4g in breast. That fat content is structural — it keeps thighs moist through 4 days of refrigeration and repeated reheating where breast becomes dry and rubbery. Thighs also cost $1.99–$2.49/lb versus $2.99–$3.99/lb for breast, develop richer caramelised flavour at high heat, and tolerate overcooking: 10–15°F past target makes thighs more tender, the same error makes breast noticeably drier.
What temperature should chicken thighs reach for meal prep?
The USDA minimum safe temperature for all poultry is 165°F (74°C) — this destroys Salmonella and Campylobacter completely. For meal prep specifically, pull thighs at 175–180°F (79–82°C). At this range, collagen converts to gelatin, producing pull-apart tender meat that stays moist through day 4. Always verify with an instant-read thermometer — cooking by time alone is unreliable across different oven models and thigh sizes.
How long do cooked chicken thighs last in the fridge?
Per USDA FoodKeeper: cooked chicken thighs last 4 days refrigerated in airtight containers at 40°F (4°C). For maximum freshness: cool completely before sealing (20 minutes on an open surface), add 1–2 tablespoons of cooking juices to each container, and keep at the back of the fridge where temperature is most consistent. Frozen: up to 4 months. Thaw overnight in the fridge before reheating — never microwave directly from frozen.
Which chicken thigh recipe is best for meal prep beginners?
Recipe 1 — Classic Sheet Pan — for your first session. It has the fewest variables, produces the most reliable result, and works with any grain and any sauce. Once you've made it twice and understand what 175°F looks like in a thigh, move to the Teriyaki Glaze (Recipe 2) for your first flavoured recipe. The slow cooker pulled chicken (Recipe 3) is the lowest-effort option if you want to start even simpler — 4 minutes of prep and the slow cooker finishes the rest.
Can you freeze cooked chicken thighs?
Yes. Cool completely after cooking, portion into freezer-safe containers or bags, freeze within 2 hours of reaching room temperature. Per USDA FoodKeeper: cooked chicken freezes well for 4 months with no significant quality loss. Thaw overnight in the refrigerator — not on the counter. Reheat from thawed to 165°F (74°C) before eating. The pan-dripping storage trick also applies to frozen portions: freezing with the cooking juices helps retain moisture through the thaw and reheat cycle.